Well last we spoke, I had just finished routing the half-circle on the sides of the chest. The project has thankfully come a long way since then.
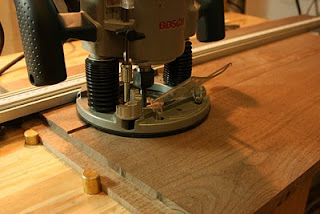
Staying true to the time period, these chests were put together very simply.The joinery consists of rabbets and dadoes. While this was commonly done with planes in the 18th century, and it would certainly still be a fantastic hand tool project, a router does a great job at this kind of joinery.
stopped dadoes for the till:
I use a clamp guide and a plunge router, and cut these dados/grooves in 2 passes
It helps to always mark cuts like these and then go back with a marking knife and sever the fibers. This way the router bit will leave a clean edge as it clears out the waste.
With all the joinery cut and the parts for the till fitted I was itching to assemble. Now generally its not a big deal to finish the inside of a box after you have put it together, but the charm of getting finish in tight corners fades after a few projects.
So, I fired up the compressor, hooked up a spray-gun and coated the inside with shellac. I like to shoot a few thin 1# cut coats and sand down any raised grain. With a smooth surface prepped, I will step up to a 2# cut and put down a nice even coat or two.
Once I had the inside pre-finished, it was time to nail it all together. Yes I did say nail, and no it will not involve a brad nailer. Good old fashioned cut-nails and hammer will do.
If you need a high-tech article on this low tech joinery, Chris Schwarz does a brilliant job of explaining:
http://blogs.popularwoodworking.com/editorsblog/content/binary/MAR06WM_HAMMERS.pdf
Sunday, June 6, 2010
Subscribe to:
Post Comments (Atom)


It's coming together very well, Nabil. I'm torn on stepping over to hand tools for some of this joinery, just because of the dust. My routers are the only thing in the shop for which I haven't figured out good dust collection.
ReplyDelete